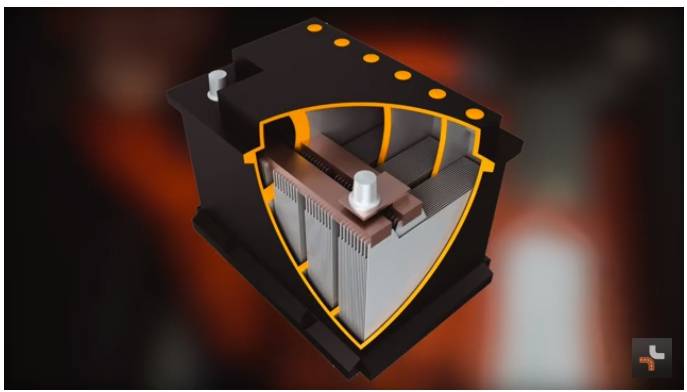
- Examine the battery
If there is corrosion on the battery terminals, remove them with a wire brush and apply copper grease.
If you discover any damage to the housing, the best thing to do is to replace the battery.
- Check the electrolyte level with the display
Remove any dust and dirt from the display and look at their color:
- Green means that the level of electrolyte and charge are normal.
- White means that the charge is low and the battery needs to be recharged.
- Red means that the acidity of the electrolyte has increased and the water level has decreased.
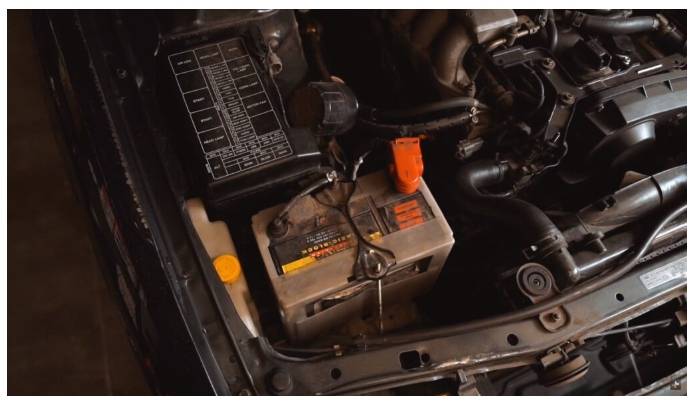
Make sure the battery terminals are disconnected.
Add distilled water if necessary.
Please wear rubber gloves when working with the electrolyte: skin contact can cause burns.
- Check the electrolyte level using the special markings on the battery housing
Make sure the electrolyte level is between the “min” and “max” marks.
Make sure the battery terminals are disconnected.
Add distilled water if necessary.
Please wear rubber gloves when working with the electrolyte: skin contact can cause burns.
4. Check the electrolyte level with a glass tube if your battery has no markings to determine the level
This only applies to batteries that can also be serviced.
Check the electrolyte level of each cell.
- Park the car on a flat surface. Clean the battery cells of dust and dirt.
- Remove the lid of the cell and insert the tube.
- When the pipe reaches the lead plates, fill it up and take it out.
- Put the cell lid back on.
- The level of the electrolyte in the tube shows its level in the battery.
Make sure the battery terminals are disconnected.
Add distilled water if necessary.
Please wear rubber gloves when working with the electrolyte: skin contact can cause burns.

- Check the electrolyte density
- Park the car on a flat surface. Clean the battery cells of dust and dirt.
- Remove the cell cover and insert the hydrometer tube.
- Draw a full sample of the electrolyte into the hydrometer. The float should float freely in the liquid.
- The marking where the electrolyte hits the scale on the float shows the electrolyte density.
- Carefully let the electrolyte back into the battery.
- Put the cell lid back on.
Make sure the battery terminals are disconnected.
This only applies to batteries that can also be serviced. “
Check the electrolyte density of each cell.
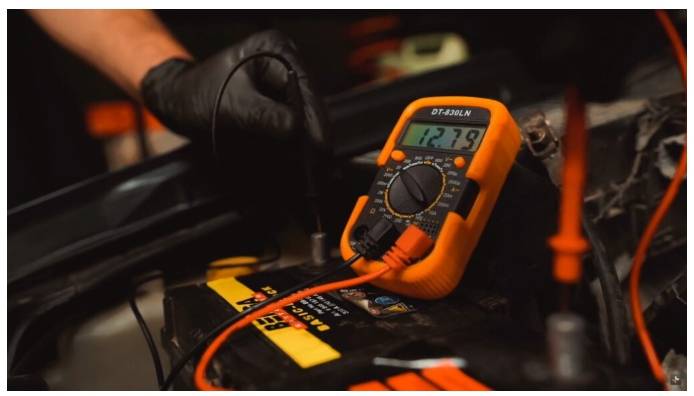
- Measure the voltage of the battery with a volt or multimeter
Set the multimeter to measure DC voltage and set the measuring range to 20 volts.
Connect the black measuring lead of the multimeter to the negative terminal of the battery and the red measuring lead to the positive terminal. Read the display of the multimeter.
- When the battery is fully charged, the voltage should exceed 12.6 volts. A voltage less than 12.6 volts means that the battery is less than 50% charged.
- If the battery voltage is less than 11.6 volts, it means that the battery is completely discharged.
Make sure the battery terminals are disconnected.
If necessary, clean the pole terminals with a wire brush before checking.
- Check the battery charge with a battery charge tester
Make sure the battery terminals are disconnected.
If necessary, clean the pole terminals with a wire brush before checking.
The battery should not be used 6 to 8 hours before checking.
Perform the check only when the electrolyte level is normal.
Connect the test leads to the negative and positive terminals of the battery:
- Measure the voltage of the battery without load resistance.
- If the measured values are between 12.6 and 12.9, the battery is fully charged.
- If the measured values are lower than 11.5, the battery is discharged.
Repeat the measurement a few times.
The review should take no longer than 6 to 10 seconds.
Wait 3 to 5 minutes between each measurement.